While your car’s finish is a big part of how it looks, it has a practical function, not just a cosmetic one. The finish serves as a kind of shield for the metal panels on your car by protecting them from corrosion. Just normal driving can subject your car to damage from factors like stones kicked up by other vehicles to being dinged by a shopping cart in a grocery store parking lot.
If you do not repair scratches promptly, they can cause your car to rust. Rust can cause extensive (and expensive) repairs that you will need a professional to handle.
Some scratches might be covered by your insurance, but they will not be covered by a car warranty. You can contact your insurance provider or fix the scratches at home. In order to understand the best and easiest ways to fix your car’s scratched finish, it is important to understand the anatomy of your paint job and to know what exactly defines a scratch.
The Elements of a Car’s Finish
The outermost part of the finish is a combined transparent wax coat and clear coat layer that provides a high-gloss appearance. This layer is your first line of protection against sun damage and other forms of weathering, as well as from chips and scratches.
The paint layer lies under the wax/clear coat and may consist of between two and five coats of paint. The number of paint coats varies from manufacturer to manufacturer. The primer coat is under the paint coat and is applied to the bare metal in order to provide a surface to which paint can adhere.
The method that you use to repair your car’s finish depends on the layers damaged by the scratch. For example, a scratch that affects only the wax/clear coat layer will have a different fix from one that goes all the way down to the metal beneath the primer.
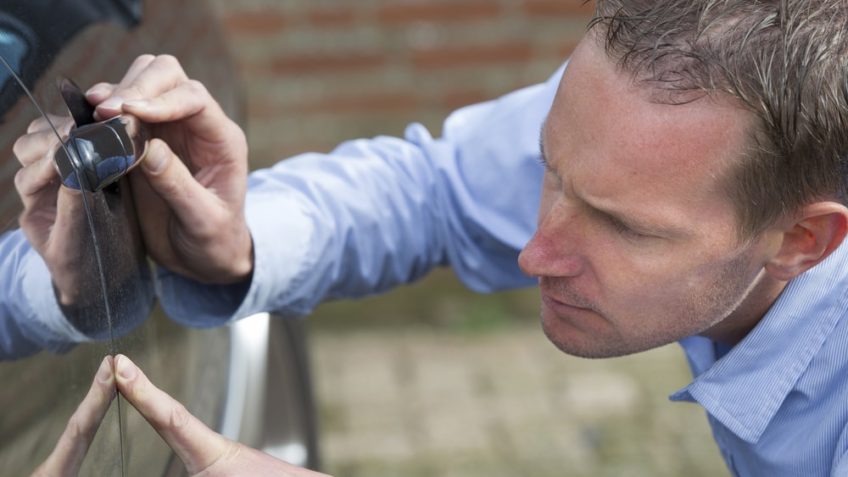
Note that the appearance of scratches on your vehicle will differ depending on its color. To easily fix scratches, follow these tips:
Step 1: Determine the Depth

The depth of the scratch determines both the difficulty of the repair and the cost associated with it. The least severe type of scratch is one that affects the wax/clear coat only – these scratches will be virtually invisible. This type of damage is very rare since the paint and the wax/clear coat usually bond to each other very well.
The next deepest type of scratch is one that removes both the wax/clear coat and the paint coat. In this case, you will see the primer layer showing through. The primer layer will be a different color; usually, it will be a light gray. Scratches that remove all layers of the finish and that go all way down to the metal will often result in dents as well.
If you cannot determine the depth of a scratch, the safest course to take is to assume that it is one layer deeper than it appears to be. This means that if you see a scratch that goes through the clear coat and paint, you can assume that it has gone through the primer coat as well.
Generic Guide to Paint (Clear Coat) Hardness By Manufacturer:
|
Soft Paint |
Intermediate Paint |
Hard Paint |
|
Alfa Romeo |
Aston Martin |
Audi |
|
Daewoo |
Bentley |
BMW |
|
Ferrari (up to 2005) |
Citroen |
Lamborghini |
|
Fiat |
Ferrari (2005 onwards) |
Mercedes Benz |
|
Honda |
Ford |
Mini |
|
Lexus |
Jaguar |
Porsche (up to 1998) |
|
Mazda |
Jeep |
Subaru (up to 2001) |
|
Mitsubishi |
Land Rover |
TVR |
|
Nissan |
Lotus |
Volkswagen |
|
Suzuki |
Maserati |
|
|
Toyota |
Peugeot |
|
|
Vauxhall (up to 1998) |
Porsche (1998 onwards) |
|
|
Renault |
||
|
Rolls Royce |
||
|
Saab |
||
|
Seat |
||
|
Skoda |
||
|
Subaru (2001 onwards) |
||
|
Volvo |
Source: http://www.theultimatefinish.co.uk/car-care-blog/detailing/paint/
Step 2: Use Toothpaste For Shallow Scratches

One of the easiest ways to fix light scuffs and scratches is with toothpaste. Toothpaste works because it is just abrasive enough to smooth out scratches that have just managed to penetrate the wax/clear coat layer but not the paint layer. Toothpaste’s lightly abrasive qualities are what allow it to be an effective tool for removing scratches in a variety of delicate items like DVD discs and the screens of mobile phones.
- Will it work? The way to check whether toothpaste will be ideal for your scratch is to see if you can feel the scratch with your fingernail. If you can detect it by running your fingernail over the surface, it may be too deep to fix with toothpaste alone.
- How do you do it? To fix a scratch with toothpaste, just place a little on a soft, damp cloth and rub the area of the scratch. Use a circular motion when rubbing the scratch. Toothpaste often contains abrasive materials such as aluminum hydroxide that can wear away any unevenness in the wax/clear coat and thus get rid of a visible scratch.
If there is paint from another source on your car’s finish, dirt or any other kind of debris, you can use toothpaste to remove that as well.
Important: Opt for a whitening toothpaste as this type has finer abrasives than those found in a standard toothpaste. These abrasives are similar to the type found in car polish.
Step 3: Use a Scratch-Removal Kit for Medium-Depth Scratches
These kits are typically easy to use, usually requiring only a few steps. You will also need a standard power drill. Ideally, you should use a variable-speed drill.
When using a scratch removal kit:
- Start by washing the chipped or scratched area with soap and water.
- Place the soap and water on the abrasive pad from the kit and rub the damaged area gently.
- Check after about 10 seconds of constant rubbing to see if the scratch is still visible.
You will want to proceed carefully with this step as the wax/clear coat is not thick. You may notice that the scratched area will lose its gloss depending on the angle from which it is viewed. You can remedy this by buffing it out.
- Do this by smearing some of the rubbing compound onto the location of the scratch. Wipe any excess compound off with a paper towel.
- You will then want to attach the buffing wheel to your drill. Start buffing the scratched area at low speeds while applying light to moderate pressure.
- Wipe with a microfiber cloth to remove any debris and switch out the pad on the drill.
- Apply wax to the pad. Use a low-speed setting and polish the area. Wipe with another clean microfiber cloth. Check the area from multiple angles to ensure that the buffed area matches the rest of the vehicle’s finish.
It is always best to repair any scratches as soon as you find them. This means that it is a good idea to have a kit for touching up scratches on hand.
Step 4: Use a Touch-up Kit for Deep Scratches
For scratches in the primer, you will need to get a touch-up kit with primer and paint from a reputable retailer. You can get your primer and paint without using a kit, but a kit will be more convenient.
- Find the paint code for your car’s finish in order to purchase the right kit. The paint code is often on the driver’s side pillar, near the VIN number on the windshield or under the hood.
- The next step will be to sand the area around the scratch. Use a relatively low grit and further scuff the area with a scuffing pad. This creates a rough which will help the primer to stick.
- Apply primer and let it dry overnight before you add paint. When you add paint, do so with thin layers that you can gradually build up to match the surrounding paint.
Fixing scratches on a vehicle is often straightforward enough that you will be able to do it without the help of a professional. The tips above can help you restore your car’s exterior and give it a clean, uniform look.